


Hey creators, we’re thrilled to have you on board! Today, we’ll walk you through how to link your bank on OnlyFans, whether you’re a subscriber or a creator.
Adding a bank account is a crucial step when using OnlyFans because without it, the platform won’t be of much use to you. You wont be able to sign up as a creator nor would you be able to pay and subscribe to other peoples content.
You might be thinking ‘But why wouldn’t be I able to add my bank?’ Well believe it or not, your residency plays a important role. Some countries are restricted on OnlyFans, and if you happen to live in one of them, you won’t be able to sign up as a creator or subscribe to others.
We made a complete list in this blog so be sure to check it out before we dive into this.
adding a bank as a SUBSCRIBER:
If you’re just setting up an account to subscribe to others, the process is pretty straightforward.
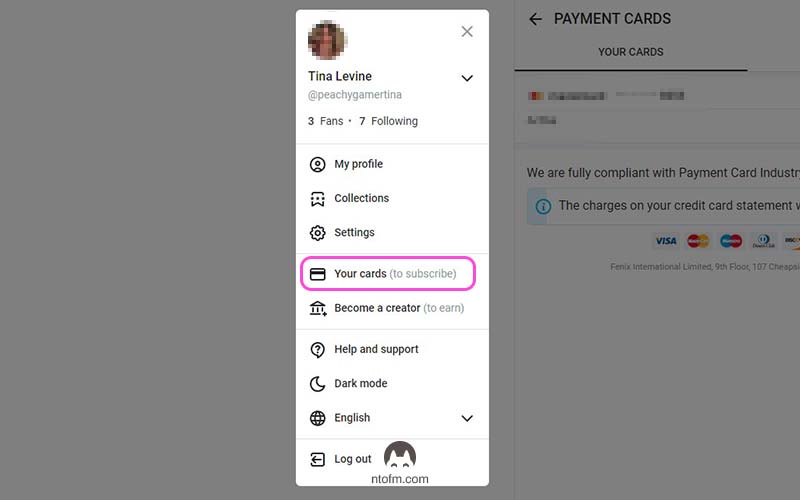
From Home go to More > Your Cards
You get the following screen.
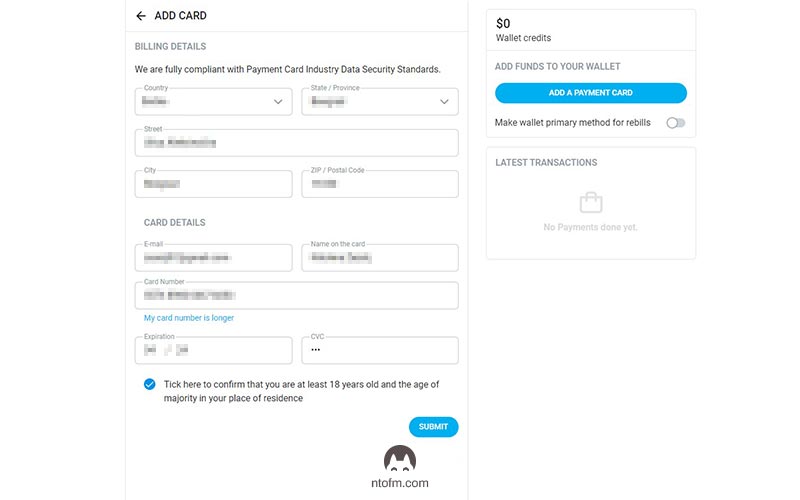
Fill in your data and click submit.
Just like that, you’ve successfully added a card to your OnlyFans account. Nice job!
You can add multiple cards by clicking on the ‘Add Card‘ button. And from the panel on the right, you can transfer money from your card to your onlyfans account, and that’s it.
When you link a card, OnlyFans will take out a small amount of 0.10$ from your balance, so make sure you’ve got enough funds to cover it.
adding a bank as a CREATOR:
Becoming a creator is a bit more complex and involves a few more steps, such as confirming your email, adding profile and cover photos, writing a bio, and completing the verification process.
We’ve put together a detailed guide that takes you through how to create an OnlyFans account step by step where we break down everything you need to do before linking your bank. So, be sure to give it a look.
But once you’ve sorted all that out, the rest of the process is a piece of cake.
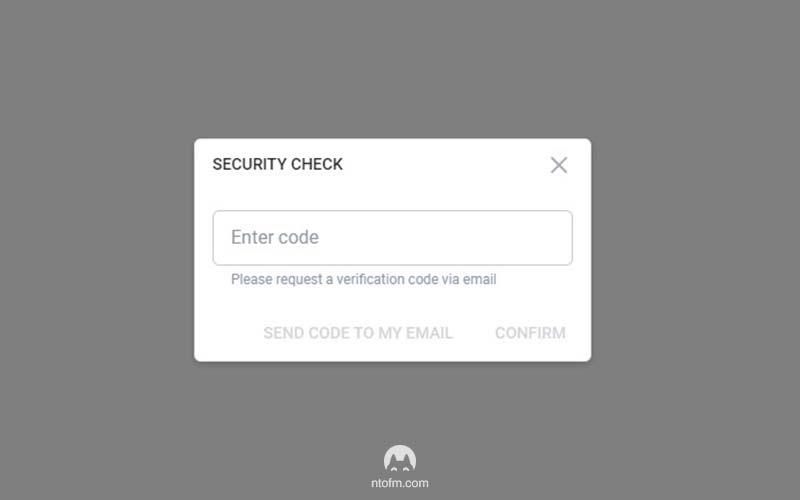
From More go to Bank (to earn). You’ll be asked to enter a code for a security check that you’ll receive on your mail, so do that. After you confirm your identity, you’ll reveal the banking page.
Depending on your country you’ll have the option to choose between multiple payout options like:
- Bank transfer ACH
- Direct transfer OCT
- International bank transfer SWIFT
- Visa Direct
- E-wallet
- International transfer SEPA
- Cosmo Payments
- Paxum
- or even some options that are exclusive just for your country
These are the options we have.
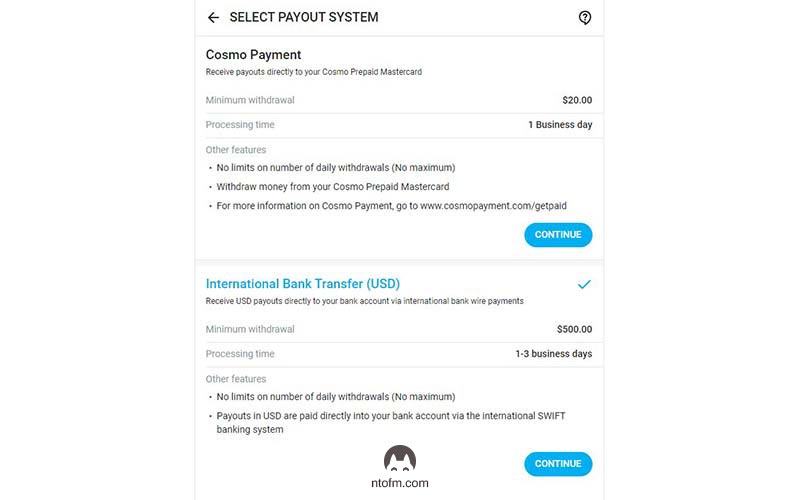
Now, select the bank one. For us, it’s “International Bank Transfer (USD)“. This will bring you to the next screen.
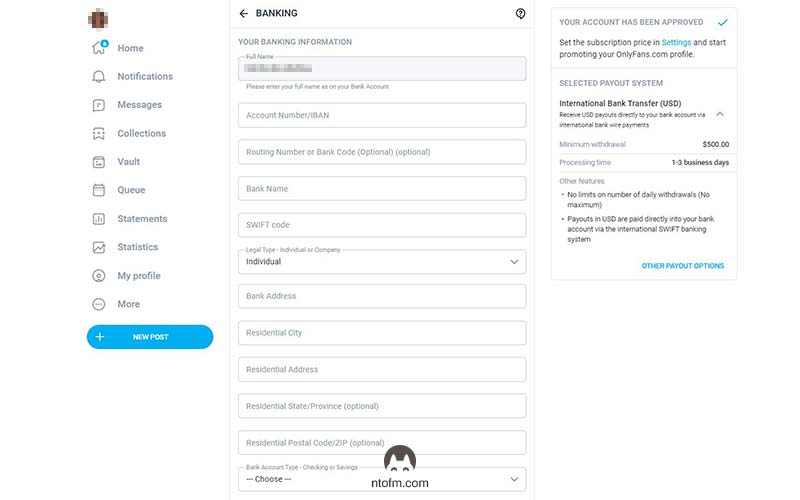
You’ll need to fill in all the fields, and we’ll explain one by one.
Full name: This should already be filled out from your verification process, and it can’t be changed.
Account number/IBAN: This is where you put in your personal IBAN number. You can usually find this in your bank contract, or on your bank’s online portal or app. Look in the settings or documents tab.
Routing Number or Bank Code: This field is optional. Each bank has its own unique code, which can vary in length from country to country. If you really want to know what it is, you can visit this site. Choose your country and see where your bank code fits into your bank account number. Those are your bank’s digits.
For US citizens, you can find your bank routing number here. These numbers are used by banks in the US for domestic payments. Each US bank has a specific 9-digit routing number based on the bank and its location. But as we said, if you’re unsure about your bank code or routing number, it’s best to leave it blank.
Bank name: Enter the full name of your bank here.
SWIFT Code: Like your IBAN, you can find your SWIFT code in your user agreement or on your bank’s online portal or app. Or you can use this link to find your bank’s SWIFT code. It’s a good idea to double-check this if you find it in both your user agreement and online.
Legal type – Individual or Company: If you’re opening an OnlyFans account as an individual and don’t own a company, tick the “Individual” box.
But if you do have a company and want to link your company’s bank details to your OnlyFans account, tick the “Company” box.
Please note: If you’re registering as a company, make sure all the other details like your IBAN and SWIFT code relate to your company bank account, not your personal one.
Bank Address: Enter your bank’s address here.
Residential Address: Put in the address associated with your bank account.
Residential State/Province: Input your state or province. This field is optional.
Residential Postal Code/ZIP: Same thing here.
Lastly, select your bank account type: checking or saving.
And that’s it! You now have something that looks like this.
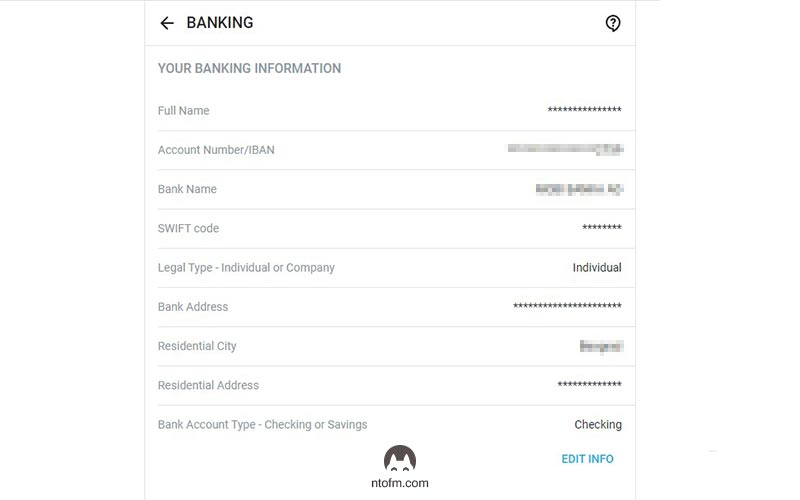
By following these steps, you have successfully linked your bank account to your OnlyFans profile. With this essential part out of the way, you are now ready to start creating content and earning money from your subscriptions and content sales!
how can i link my bank if my country is banned on onlyfans?
Unfortunately, there’s no way to work around this. If your country isn’t listed in the dropdown menu when adding your bank, then that’s the end of the road.
However, if you happen to have residency in another country that’s supported, or if you can open a bank account in a different country, you can bypass the limitation and link your bank to OnlyFans. That’s the only available option in this situation.
Wrapping it up
That’s everything you need to know when adding your bank to your onlyfans account!
The OnlyFans universe is super broad and diverse, and getting these basics down pat is your first move towards success. Speaking of it, if you wanna explore more? Check out our all-in-one guide, “How to Start Your OnlyFans Journey in 2023“.
We truly hope you found this post helpful and informative. Here at NekoTech, we’re all about giving creators like you a boost. Just remember, the road to success on OnlyFans is more of a long run, not a quick dash. Take things slow, keep adding to your knowledge, and above all, don’t stop creating.
Feel free to hit us up if you have any questions or need a bit more help at contact@nekotechagency.com. Keep those creative juices flowing!